How to Install a Mobile Solar Container Effectively
Using a mobile solar container (or off-grid solar container) is a transportable, movable power solution. But efficient installation, planning, accuracy, and solar + energy storage integration expertise are required in order to have it. Here’s the step-by-step guide supplemented by the lessons learned from government and academic tests to ensure you get it right.
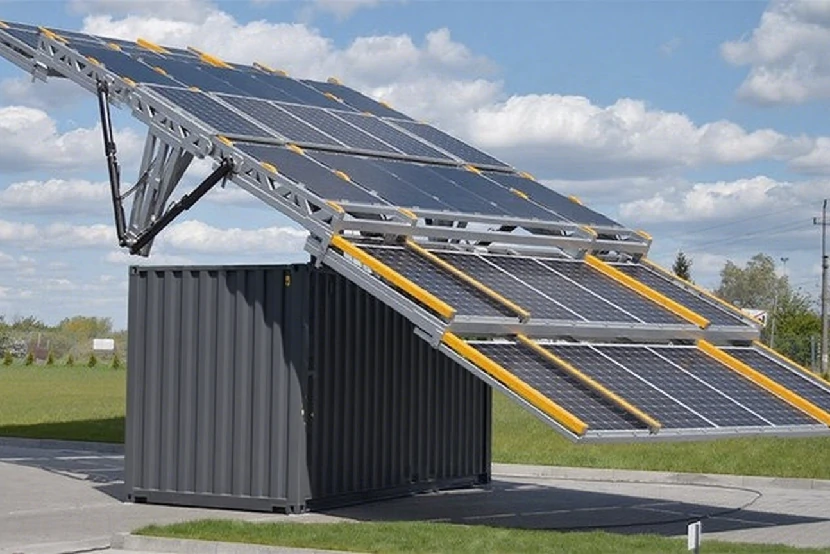
What Is a Mobile Solar Container?
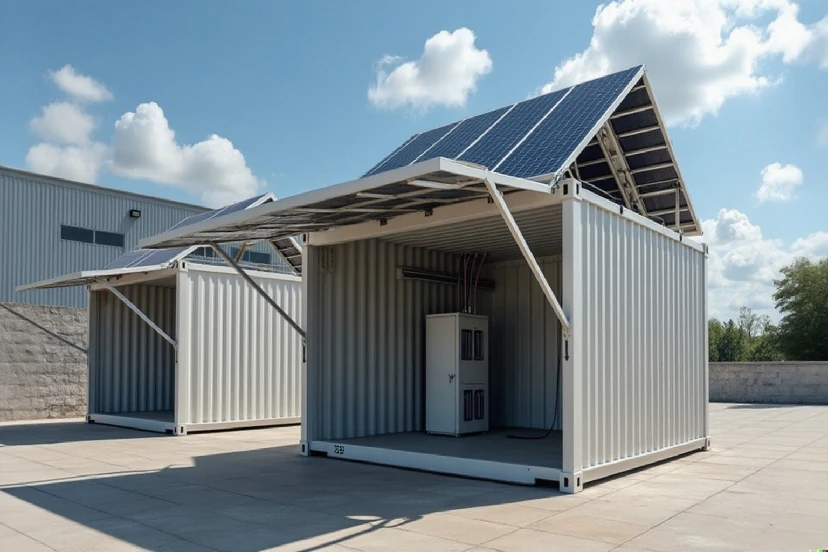
A solar container is a pre-integrated self-contained unit that is built in a container casing (or equivalent enclosure) using solar panels, battery banks, inverters, and controls. It makes off-grid mounting or hybrid grid-connection possible. Because the devices are pre-integrated and modular, field installation time can be drastically reduced.
Government studies advise broader use of modular “solar + storage” architectures: the U.S. Department of Energy’s Solar Integration program emphasizes that combining solar and storage systems increases reliability and grid compatibility.
Step 1: Site Assessment and Layout Planning
Sunlight & Orientation
- Estimate available sun hours based on solar irradiance maps or local meteorological data.
- Orient containers so panels face true south (Northern Hemisphere) or true north (Southern Hemisphere).
- Space to avoid shading, considering seasonal sun angles.
Ground Conditions & Foundations
- Use concrete pads, piers, or screw piles—offering structural stability under wind loads.
- Offer a level surface (a few degrees) to prevent mechanical stress on modules.
- Provide provision for anchoring or ballast in high-wind zones.
In microgrid installation guides (e.g., NREL / DOE microgrid reports), design planning and site selection are key aspects of the design process.
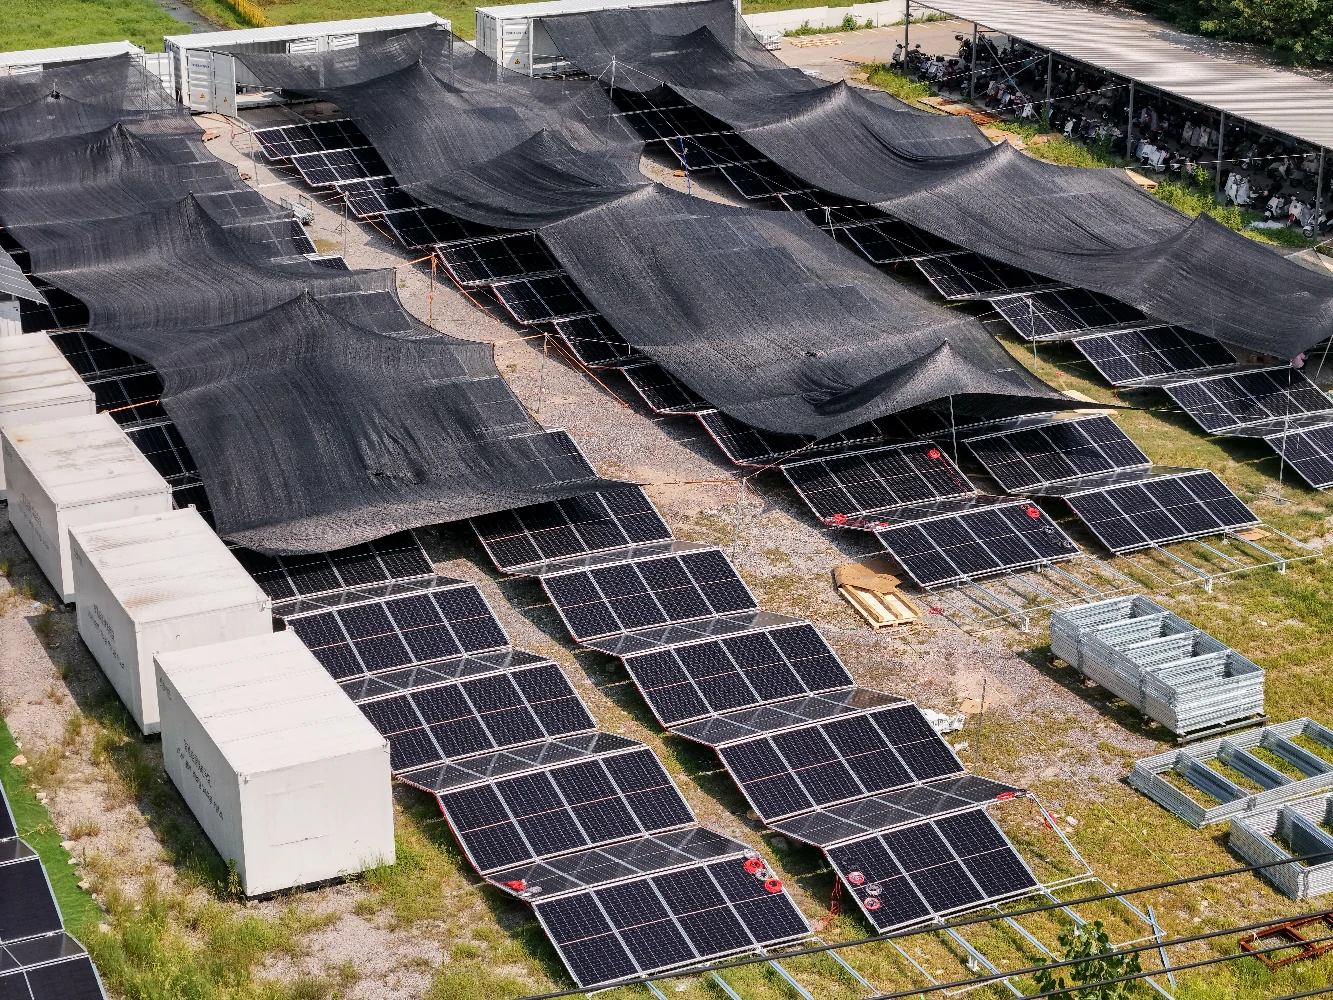
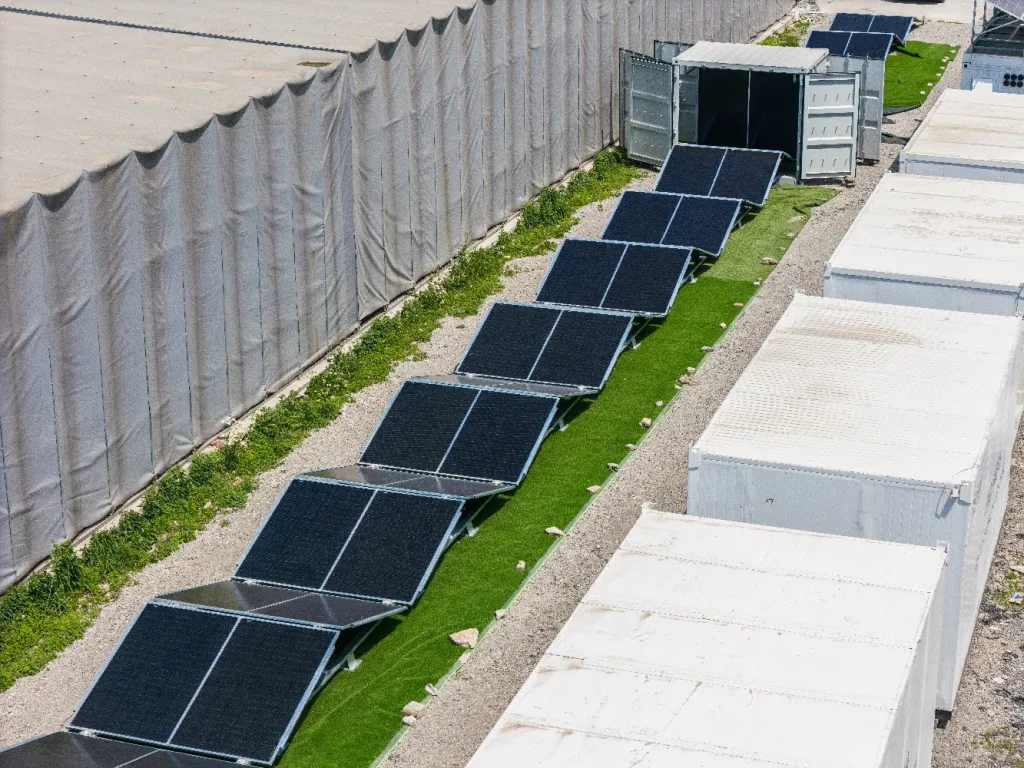
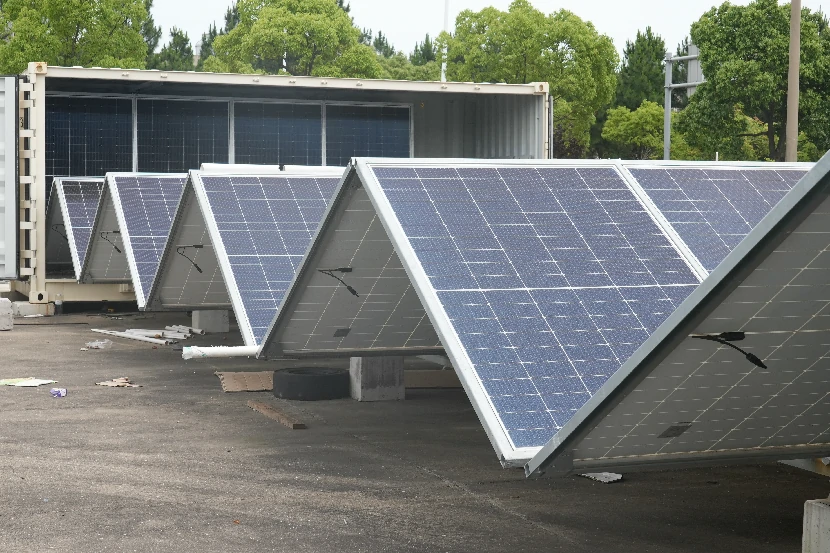
Step 2: Mechanical Deployment & Panel Extension
- Move the container into position using trucks, cranes, or deployment trailers.
- Secure twist locks or anchoring points—lock the container in place before further work.
- Deploy slide-out or fold-out panel arrays (if the container is equipped with deployable modules).
- Check mechanical linkages, locking pins, and movement rails for full extension.
In sophisticated microgrids, preassembled and modularized equipment reduce field errors and speed deployment.
Step 3: Wiring and Grounding (Electrical)
DC Side (PV String to Combiner to Inverter)
- Use UV-rated DC cables of suitable size to ensure < 3% voltage drop.
- Fuse PV strings and connect into a combiner box.
- Install a DC disconnect switch before the inverter.
- Install proper grounding for frames, container chassis, and racks.
Battery Side
- Interconnect battery modules per manufacturer topology (series/parallel).
- Implement a Battery Management System (BMS) for cell balancing and protection.
- Insert protection and disconnects.
AC Side (Generator / Grid / Inverter to Loads)
- Interconnect inverter output to a load panel internal.
- Use overcurrent devices, fuses, and ground fault protection per local code.
- If hybrid with generator or grid, incorporate transfer switches or automatic changeover logic.
Step 4: Control System and Configuration
- Install the EMS (Energy Management System) or controller integrated into the container.
- Program charge/discharge limits, autonomous fallback (generator or grid), priority loads, and safety settings.
- Test under range of load profiles to confirm switching and behavior.
In high-level microgrids, control strategies such as predictive or event-triggered control are utilized to enhance performance with stability.
Recommendations for Efficiency and Reliability
- Pre-wire modules at factory as much as possible to minimize on-site work.
- Use modular battery racks to allow for future capacity expansion.
- Offer climate control inside the container (vent fans, insulation, cooling) to prevent thermal stress on batteries and electronics.
- Route cables internally with caution, reduce sharp bends, and abrasion protection.
- Impose remote monitoring (via LTE, LoRa, or satellite) for real-time notice in the event of performance degradation.
- Offer spare breakouts and known circuits to make maintenance easier.
Practical Questions Imbedded in Context
Sporadically operators wonder whether the container must always face south or whether it is okay to have minor deviations. Practically, a ±10° deviation from optimum azimuth only reduces energy modestly—to permit more flexibility in layouts under physical constraints.
Another question: can one individual deploy the system alone? In small-scale installations, yes—but for larger containers with fold-out arrays and substantial batteries, a small crew (2–4 experienced technicians) is recommended to safeguard and facilitate accuracy.
By following these steps—site planning, mechanical deployment, electrical wiring, intelligent control setup—you can install a mobile solar container confidently and reliably.

Contact US